
Welcome back to Your Art Path tutorials!
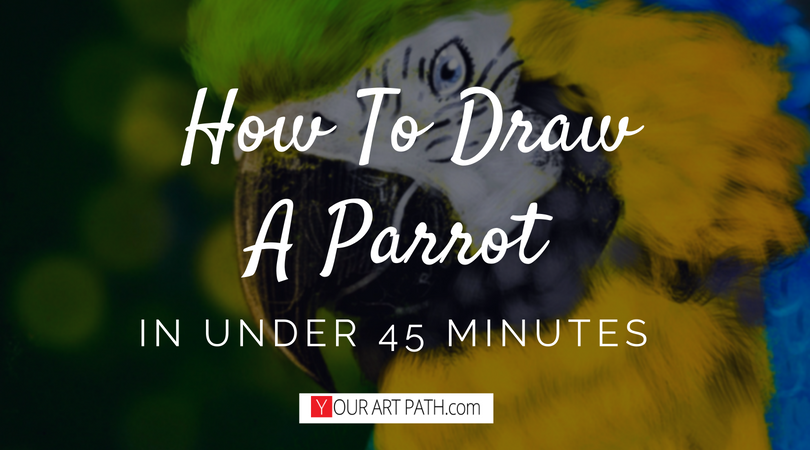
Today I will walk you through my process of drawing/painting a parrot. The sketch took me just under 45 minutes to complete, and I will gladly share with you the steps I took 🙂
Hope you enjoy it, and let’s get started!
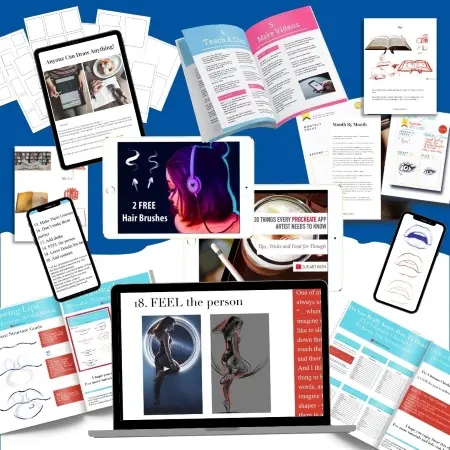
In case you would prefer a video course and not a written content – you can check out my Skillshare course, a preview of which you just saw above 🙂
The Skillshare Course I made is Absolutely Free for my first 100 students with this link.
After that, you can still watch it for free with another offer I have for you, where you are able to watch all Skillshare classes for free for 2 months! Just by following the link here.

Art Materials
So the materials you will see me use are Procreate app on IPad Pro (which I absolutely love).
But the things I will be talking about here can apply to any other media – digital or traditional!
Before We Get Started
Before we get started, we need to find a reference image!
In my other blog post, I mentioned some of the great free resources with cool stock images that can be used for free!!
(Please, don’t just draw straight from an image you found on Google and claim it as your own, or you can get in trouble!)
So, for this project, I was using Pixabay.
And found this awesome image that I liked:

10 Steps To Painting A Parrot
Step 1: Canvas Size
For this project, I decided to have my canvas in an unusual size – the reason for that is that I would like to have the reference image on the side of my own sketch.
So the size I went with is 5000×2000 pixels.
It’s a great size because now I can afford to have a space for the reference, for my own sketch and extra space on the side in case I need to test some colors or brushes.
When the image is completed and you save it – don’t worry! The cropping won’t affect the quality of your piece as it is big enough to not get pixelated 🙂
Step 2: Setting Up Your Workspace
Now I grab the reference image and duplicate it. On the left, I have a smaller size thumbnail (helps me focus on the big forms), and on the right the same exact proportions but in a bigger size.
Now, I will lock the layer of the right image and cover it with a different color (no I won’t be painting on top of the photograph!)
Step 3: Sketching
I sketch very roughly, and love being able to get rid of the sketch when I get to painting. And that’s when digital layers come in handy! So I always start working on a new layer, and not on the background color.
If you are working traditionally – you can use a pencil so that you are able to erase it afterward.

Step 4: The Four Things To Think Of
There are 4 things I think about when sketching:
1. Big Blocks Of Shape.
- Look at the bigger image and simplify – what common shapes do you see?
2. Negative Shapes.
- Sometimes we think we “know” what something looks like – and that’s the reason why we often draw it in the wrong way!
- Look at the negative shapes that are on the outer side of your subject – and you will truly know what they look like.
3. Angles.
- If curved lines didn’t exist – what angles would the Big Blocks Of Shape take?
4. Relation.
- How does one important point on your object relate to some other important point?
Note: you don’t need to get everything absolutely right from the first time! Remember, practice makes perfect – and you can always modify with each step to get to a better result 🙂

Step 5: Figuring Out Colors
If you have more time to spend on a drawing – I highly recommend trying to figure the colors out yourself without using any additional tools.
However, for the sake of this assignment – doing it in under 45 minutes – you are welcome to use the color picker and get some basic colors from your reference.
You will still need to make some adjustments and color variations later on to achieve the best possible results!
So here you can see I grabbed 10 basic colors I will use, but later you will also notice that I constantly adjust the hue, saturation, and brightness to get the 3D semi-realistic look.
Step 6: Laying In Basic Colors
This is a step that shouldn’t take you much time at all!
You have basic colors ready for use, so now grab a rough and BIG size brush and get to it!
Remember, no zooming in and no detail at this point!!
Step 7: Getting Closer And Fancier
It’s now finally the time to get rid of our sketch layer (or erase your pencil sketch) and start getting into details.
This is the first step when you can zoom in your canvas for details, even though some artists still prefer not to – up to you.
You can use a smaller brush and start working on textures.
We don’t want to paint every feather!!!
So find a brush that would be rough-looking and somewhat resembles the feel of feathers 🙂 I find that multiple layers of a hair brush work well for this.
It will save you a million extra hours of work (unless you are going for a very detailed look, but then this article wouldn’t be called the “Drawing A Parrot in UNDER 45 minutes 😉 )

Step 8: What’s Your Focus Area?
As we don’t want to work in a hyper-realistic fashion, but still need the image to be believable – we need to figure out what’s the main focus of this image?
I picked an eye. But you can pick anything you like, and then put the most detail and contrast in this area.
The eye works great for this image as it has both the whites and the blacks that I am able to combine and use to their full potential for this purpose.
Another trick that will strengthen the focus area – is if some parts of your image are blurred out ( as I did here with the edges of feathers and the background).
Step 9: Adding The Background + Cropping
I usually work on the background as I’m close to the end, but you are welcome to work on them simultaneously if that’s what you prefer 🙂
As for the background, I decided to add some blurry bokeh look instead of copying it exactly from the reference image.
Again, you get all the artistic freedom and are able to change anything you like about this image.
And the cropping can be done in any software – Photoshop, Lightroom or simply the “Photos” App on your iPhone/ iPad as I did with mine 🙂
Step 10: Edit and Sign
This is my personal last step of working on a piece.
I love editing photographs – and so when I work on my art I love editing it too!
Sometimes, it doesn’t help… But in times like these, it really unifies the work and makes it POP!
For my editing, I use Adobe Lightroom, but you can use any other software you like.
Stylistic Preference – I LOVE adding noise to my artworks – it just makes them look so much more ALIVE rather than having the digital look (not like there is anything wrong with digital. Again, stylistic preference.)
And of course – sign your work and put it out for the world to see!
I can’t wait to see your art, so please leave a link to it in the comments, or upload it to projects on Skillshare page with all the other people who will participate 🙂
You can also use #feedback in the description to receive some feedback from me!

Call To Action
I hope you enjoyed this short tutorial, and are ready to go paint a parrot yourself!
If you would like to see my video process with explanations of how I was creating one – check out my Skillshare course!
Skillshare is a paid platform, but as my reader that signs up through my website – you get 2 months FOR FREE with no payment upfront 🙂
And so you can enjoy the 2 free months of Skillshare watching mine and other artists’ courses.
My 3 Skillshare Courses:
- Make A Short Animated GIF Using Photoshop.
- How To Make A 2-Page Comic Strip.
- How To Paint A Parrot In Under 45 Minutes.
My Top 3 Courses From Other Skillshare Teachers:
- “Characters in a Scene: Sketch to Digital” by Patrick Brown.
- “Character Concept Art: From Initial Sketch to Final Design” by Charlie Bowater.
- “Introduction to Caricature: Draw a Portrait with Digital Tools in 6 Minutes” by Jon Casey.
Don’t leave your learning for tomorrow! Because tomorrow you will wish you started yesterday!
Feel free to Pin these artworks to your Pinterest boards for future inspirations! ?
- Oh, and don’t forget to subscribe to our email list and follow us on social media if you would like to read our future posts!
- Facebook, Twitter, Pinterest, Instagram.
Good luck on Your Art Path,
– Anna, Your Art Bud ?
Blog Posts to check out next → ”How To Draw A Dragon 7 Awesome Books”
and → “23 Unique Gifts For Harry Potter Fans”