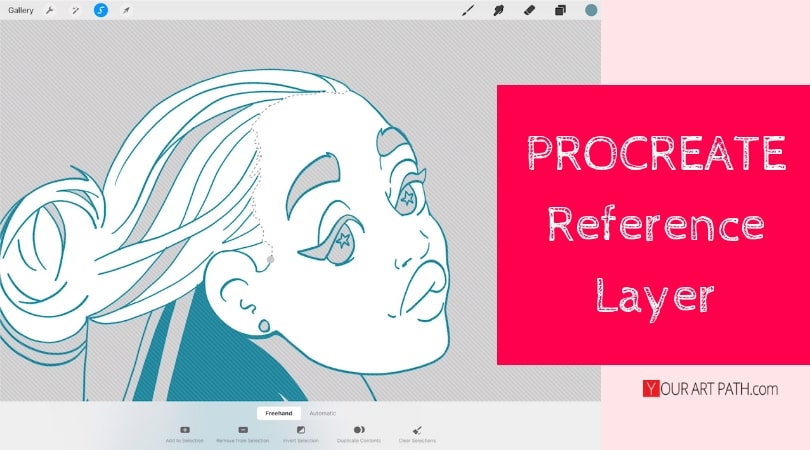
What is Procreate Reference Layer?
Procreate reference layer is an advanced feature in Procreate that allows you to keep your line work intact, while coloring it easily on a separate layer.
Who is it good for?
- Artists who create clean line art and want to color it while keeping the line art untouched.
- Artists who want to speed up their coloring process
- Cartoonists, graphic novel artists, illustrators.
What is it good for?
- Dropping colors on a separate layer without damaging the original line art
- Easily change the color of a shape
- Speeding up your coloring process and setting the color mood of your painting easily
 1")
How to use it?
- Create a clean line art
- Click the line art layer you previously created, and from the pop-up menu choose “reference”.
- Create a new layer below or above your reference layer and will be affected by it.
- Then you can use the select tool to select a specific part of your line art (or multiple parts) and use a brush for textured effect or drag and drop color to quickly fill out the part.
- You can create multiple layers for different parts of your line art in order to be able to quickly change it afterwards.
- Once you are done, you can quickly change your layer from “Reference” back to regular by tapping on it and selecting the “Reference” option again.
- Or if you have multiple line art layers for different parts of your artwork, you can just make the next layer a “reference” layer, and the previous one will be deselected right away.
Some struggles you might experience:
- If your line art is not clean, then the reference layer won’t work, because it only works on places that have a solid outline.
- If you use a textured brush then it will work in a funny way of creating lot’s of textures in places you might not want them. However, it can also create a nice effect if it fits your style.
Video Lesson That Explains Reference Layers in Depth
I hope you enjoyed the video tutorial I created for you!
And if you would like to get those freebies (20 Things Every Procreate Artist Needs to Know and 2 Free Hair Brushes) feel free to subscribe HERE and I will send them to you right away!
I only use this feature if I work with clean line art and want to fill up shapes quickly!
It’s not always the ideal way to color things, as you can always use Alpha Lock. However, it works just fine in some cases 🙂
If you have any question about this tool, feel free to leave a comment down below and I will reply to it as quickly as I can.
And if you have any tools in Procreate that you struggle with and you would want me to cover – leave your ideas down below in the comments section as well.
I look forward to reading your opinions and thoughts 🙂
Some other Procreate related Procreate Articles you might enjoy:
- 10 Procreate Tips and Tricks – Things Every Procreate Artist Needs to Know and Do
- 18 Procreate Hair Brushes for Believable Hair Painting


2 Responses
I am very impressed with your tutorials, and other resources! You have me thinking about setting up a new portfolio website, or at least improving my own!
Thanks again, Carol!
If you need help with setting up a portfolio website you can also check out this artcle: https://yourartpath.com/how-to-create-a-portfolio-website