Let me walk you through my process of How To Draw Portraits Step by Step or How To Paint A Portrait In Photoshop.
Drawing people is one of the most common practices since the very early ages. A long time ago, people did it to immortalize the rich (as they were the only ones who could afford it). Now, we do it for the fun experience and for the beauty!
Portraiture is probably the most drawn subject. And one of the hardest to pull off well.
For this tutorial, I will use a photograph I found on Sktchy (an app where people post their photos for artists to draw them).
10 Steps to Portrait Painting in Photoshop
Below, you will see a time-lapse video as well as steps in pictures with explanations. Enjoy!
Step 1: Rough Sketch
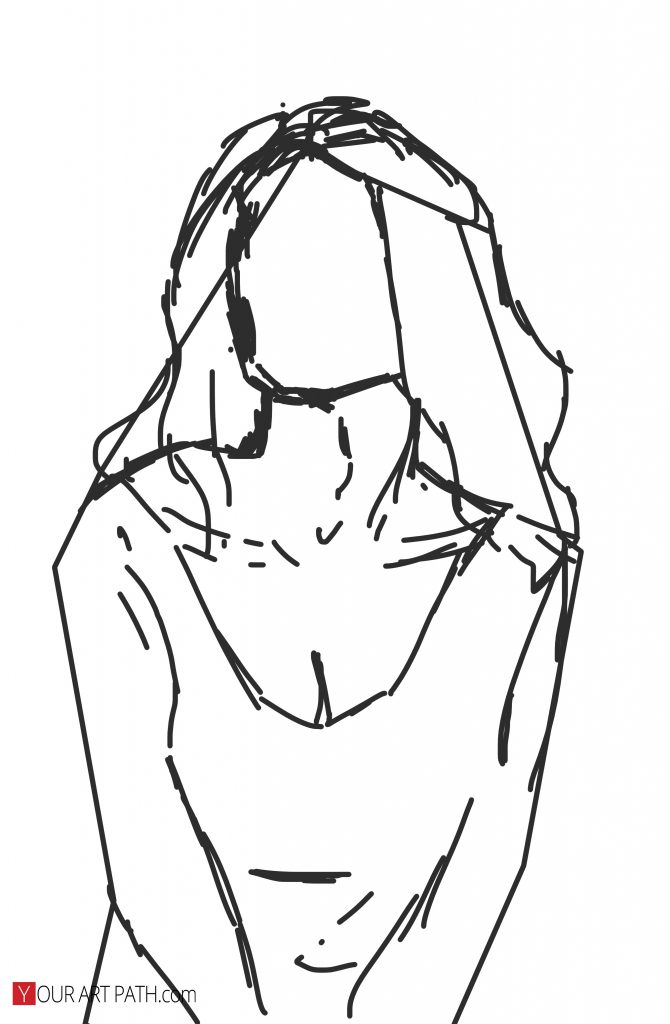
To start, focus on big general shapes, forgoing the details. Start with basic straight lines, then some curves.
The goal of this step is to find the right proportions for the whole figure.
Think about the angle at which the line goes from one shoulder to the top of the head and then to the other shoulder, etc.
Related Article: “How To Practice Drawing Effectively“
Step 2: Fixing Basic Proportions
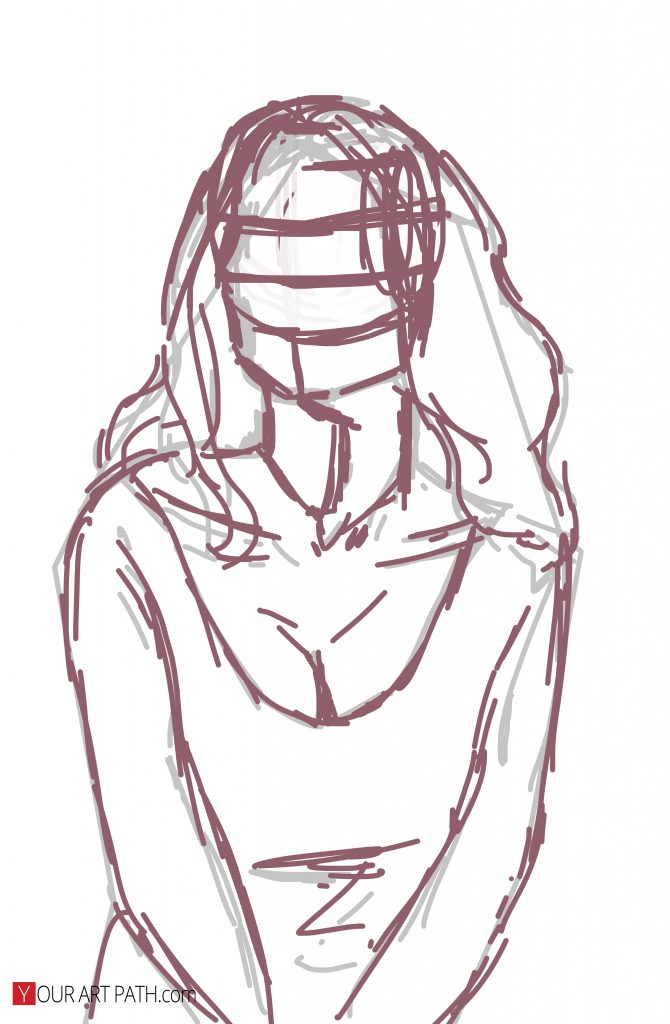
When you have the basics figured out – the next step will be to fix them up (still roughly) and add a little more detail.
I’m using Photoshop for this tutorial and I love that I’m able to work with digital layers.
Therefore, I keep the 1st rough sketch layer below and turn down its opacity to 10-20%. This way, I can still see the base, but can easily make adjustments on the new 100% opacity layer.
Related Article: “How To Get Better At Drawing From Imagination – A 3 Step Process“
Step 3: Rough Face Line Marks
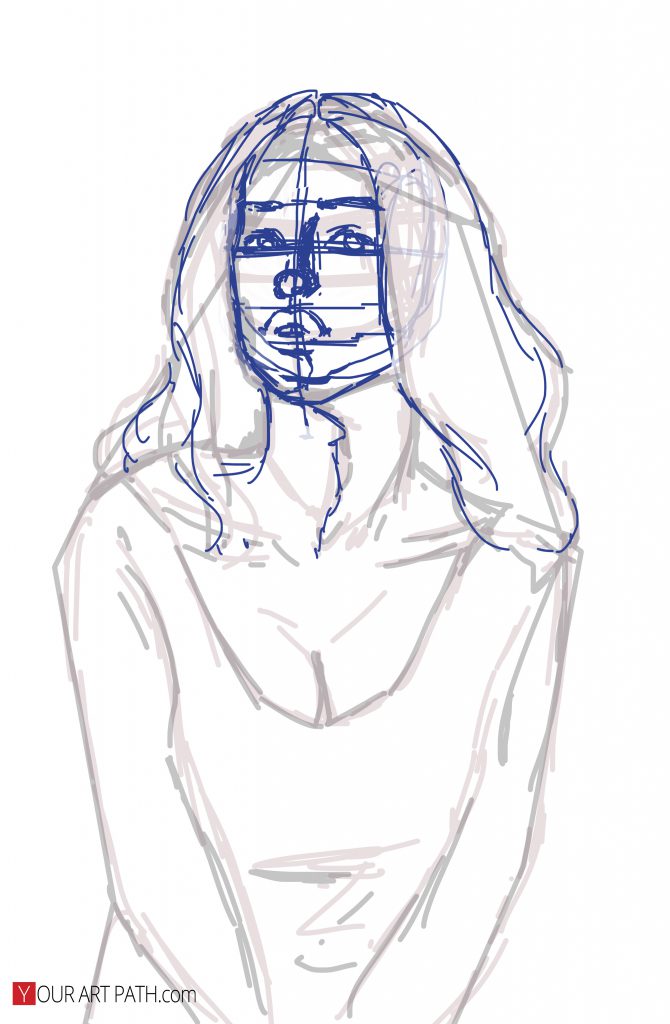
By this step, our proportions are all set in the right spots. Now it is time to zoom in and focus on the face.
I turn down the second layer’s opacity to 10-20% and create a new layer where I’ll put down the essential landmarks of her face.
I like working in different colors rather than just black, which helps me focus on my current working layer rather than the dimmed one.
Related Article: “Learn How To Draw Realistic Portraits From These 20 Books“
Step 4: Linework
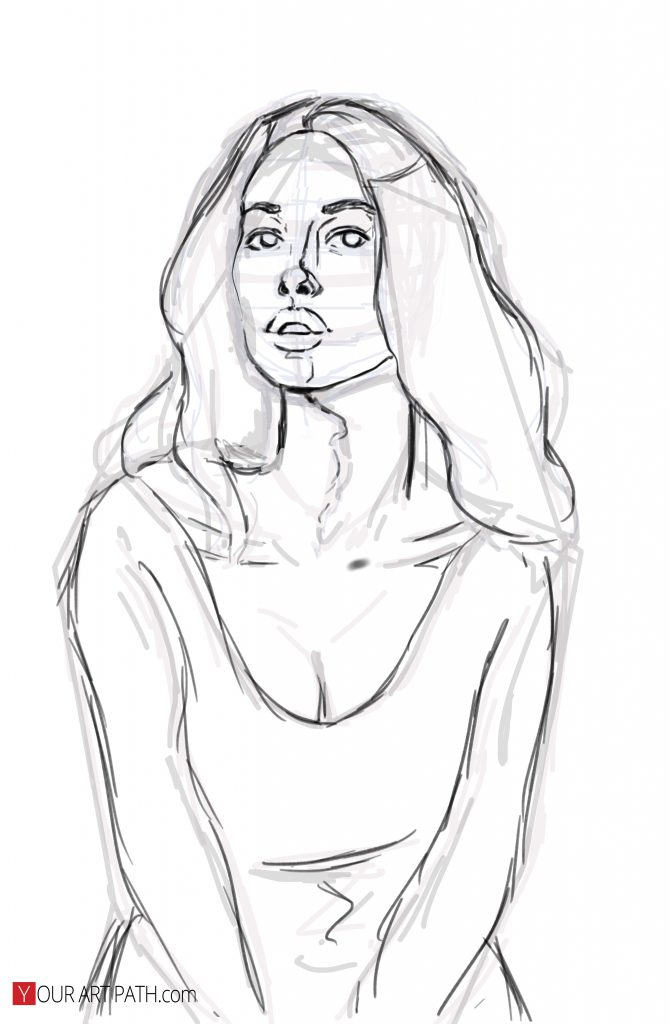
The “blue face marks” layer’s opacity gets lowered as the previous ones did and now we get to work on our most refined part – line work.
It doesn’t have to be perfect as we paint over it later on, but you should place it in the correct spot. Thus, I’m going in and creating pretty neat lines while fixing some minor mistakes.
I also added suggestive marks of where the shadows might go (as the one on her neck and face).
Related Article: “Step-by-Step How to Draw People Stylized“
Step 5: Plane Separation

One common next step is separating foreground, middle ground and background with values representing each.
In this case, I use black for the background and grey for the foreground.
I like starting from greyscale and building values from there rather than starting with pure white. This step helps me avoid overexposing or underexposing the final painting.
Step 6: Basic Values

On a new layer (while still keeping the linework layer visible and on top of the new one), I start figuring out the shadows and the primary light source.
Once again, start big (the whole subject) and slowly narrow it down to the individual parts.
In this case, the light is coming from the top left. Knowing this, I take a big brush and go over the gray color with black on her bottom right and a light gray (not white) on the top left corner – it’s a good start!
Related Article: “What is Value in Art? Definition, Examples“
Step 7: Building 3D Forms Through Value

The main focus of portrait paintings is, obviously, the face.
If my whole painting looks fantastic, but the face doesn’t- there is no way it’s a successful art piece. That’s why it’s an excellent strategy to figure out the main focus, face in this case, before moving further.
I always try to find all the darkest values and apply them at the beginning – don’t be afraid to paint it in pitch black, but don’t overuse it. Most dark spots have a lot of value in them, which is just a different variation of dark grey.
Then I go on and make my color lighter, lighter and lighter until I reach white.
This is a crucial step as all the values define how the viewer reads every form – if it’s round, sharp, plain, in front or behind, as well as it’s texture.
Step 8: Adding More Values On The Whole Piece

When I’m 90% happy with the face, I move on to the rest of the painting.
Some people like focusing on every area equally – and it’s a great way to ensure that every area has as much detail as the previous one.
However, in my case, the main focus is the face, so I spend most of my painting time and effort on it.
Continue building values that make sense for the whole piece. Squinting your eyes while working will help you not lose the big shapes.
Step 9: Merging With Background

Because I previously created a selection and worked within it (as you can see in the speed paint video tutorial I created), my figure stands out sharply from the background.
That’s why I will now create a new layer, take some background color, and go over the figure to blend them together.
If I do it on every single part, it will look blurry, so I only select some areas – most of the right side and bits and pieces from the left.
Step 10: Adding Finishing Touches
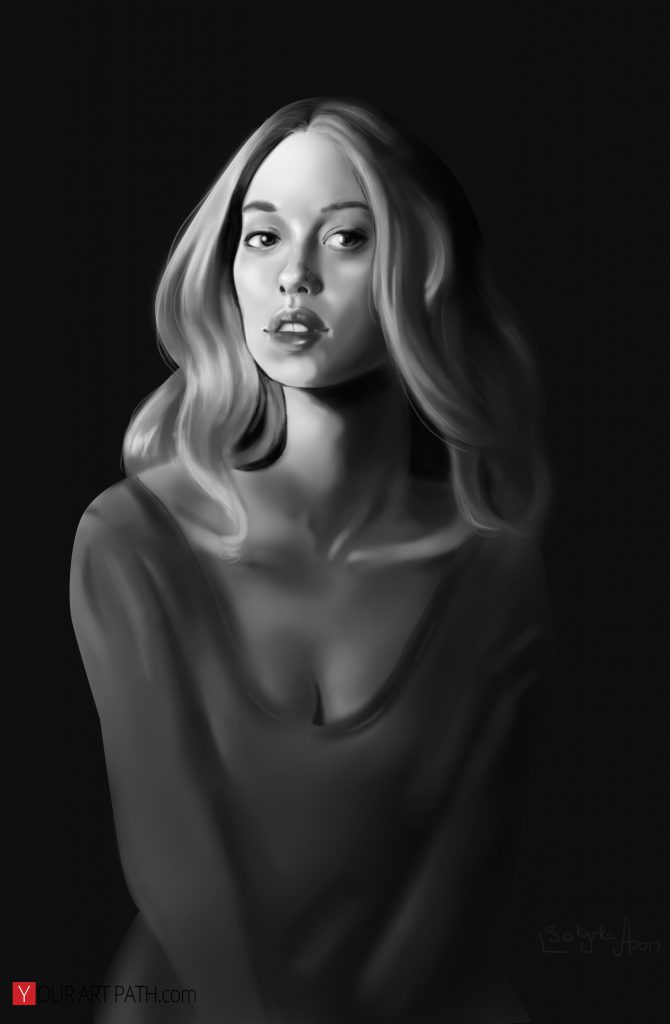
My favorite part of painting is when the piece truly comes to life.
So, in the last step, I add little details here and there – highlights, shadows, little invisible right-away lines, hair strands, textures, etc.
Details are what make up the piece! The viewer won’t necessarily notice them, but their subconscious will register those details, making your piece more exciting and interesting to look at.
–
And that’s it!
Now, if I want to color this piece it will be so easy! We now have the most important part done (values), so on a new Overlay layer we can play around and plan the colors!
I usually have a few thumbnails that look like this:
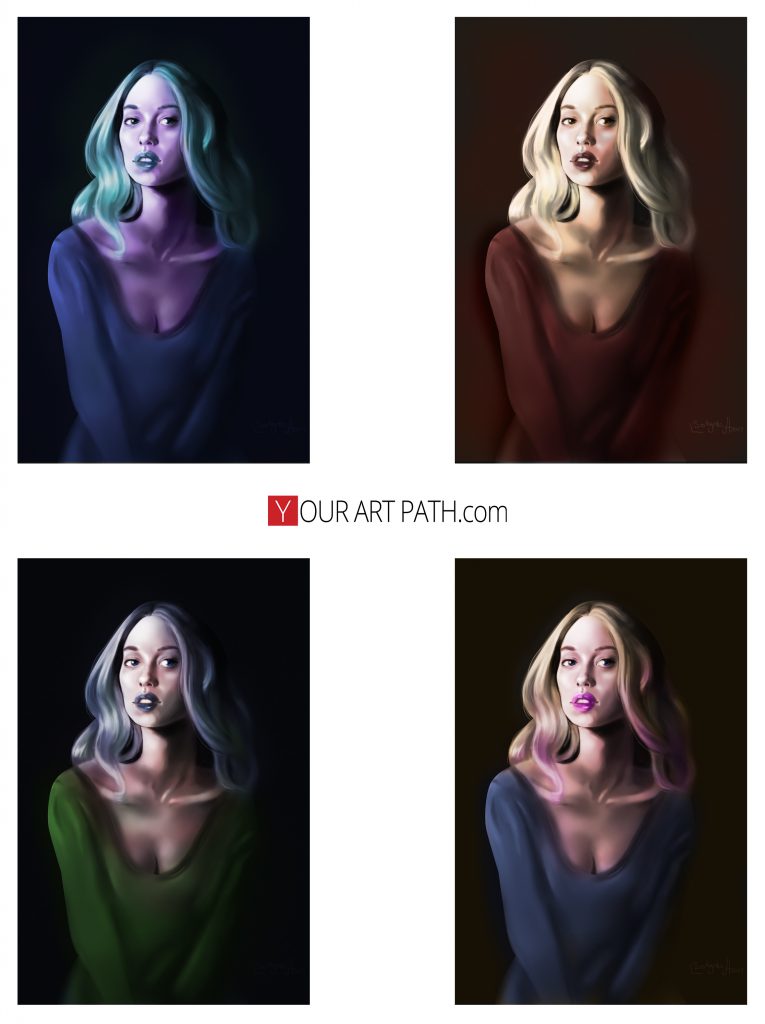
You can learn more about easily coloring your greyscale paintings here
I hope you enjoyed this portrait painting tutorial!
Please leave any comments on it below, and share on social media if you found this useful 😉



6 Responses
I am the first one to comment here but I doubt I will be the last want to say this. Your art seriously amazes me. I started off looking at the rough sketch of all the way in the first slide in the beginning. My first impression was that after you finish drawing the full picture it will look like some kind a cartoonish character of a woman. As I got to the part of the gray 3D area, you totally shocked me. Her eyes actually look like a pair of real eyes from a photograph. I am not sure if this picture you drew is modeling after a real person or not, but if this was a persons image that you imagined in your imagination then I would say that you put a soul into your picture. How long do you think I have to practice before I can draw like you?
Thank you for your such nice comments!
This is a very interesting post. I myself am not much of artist, but I always loved to doodle.
I think I am going to take your suggestions and try to do a portrait of my girl.
Better wish me luck, this is going to be interesting!
Thanks for the read!
Brendon
Good luck! And let us know how it turns out 🙂
hello!
is it possible to do this in paint tool sai?
i want to do a portrait of my sister ^^
Karen, of course! The tool icons might look/be named differently, but they usually work very similarly to one another.