
Procreate App
Procreate app is an amazing drawing and painting tool for your iPad.
It’s updated frequently and new incredible features keep popping up with every update!
I used to use a graphics tablet, but now I’ve completely switched to my iPad Pro and the Procreate App.
It’s a funny tool, really, because every time I think I’ve mastered it – something new would come up and blow my mind!
And since it took me almost 2 years to know the ins and outs of it (before a new update comes around), I’ve created a video course called Mastering Procreate App and I try to update as frequently as I can!
It’s a great tool for those of you who are just getting started and want to learn everything there is about it.
If you have an idea in mind but don’t know how to make it happen because of technical ideas then make sure to give it a look 🙂
This video and tutorial is a part taken out from the Mastering Procreate App video course itself (Module 3, Lesson 4 “Layers”).
This is a written breakdown of what I’m teaching in the course, and there is also a video with all of this information at the end of this article!
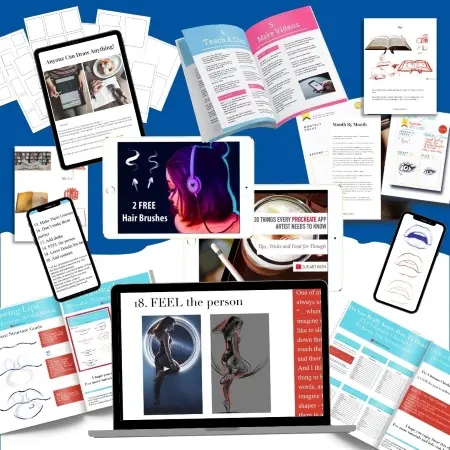
Before we get started, I wanted to let you know that I’m also giving away 2 Freebies for Procreate Artists.
2 Free Hair Brushes for Procreate + “20 Things Every Procreate App Artist Needs to Know” PDF. Grab yours for free HERE.
Now, let’s get into it.
Procreate Layers Tutorial
 1")
Layers are the base of your painting.
If you ever worked in other digital painting software you already know that they are an incredible tool in the hands of artists!
So let’s get started by locating them.
Inside a new painting that you created, go ahead and locate the layers icon (1a). When you click on it, a new menu will open up for you.
It will already have a “Background” Layer on which you can’t draw, but only change the color of your background. It’s a pretty handy tool to get you started especially if you like sketching on a neutral grey background.
If you turn off your background layer, you can save your work as a PNG file with a transparent background.
Then, the + sign (2a) creates a new layer. Depending on your layer size you will be able to create a certain amount of layers. So if you love working with extremely large dimension, make sure you keep your eye on that.
When a new layer is created, it will be automatically selected (highlighted in blue, 3a) and given a generic name “Layer #”. That’s your working layer now on which you can start drawing right away!
To move the layers around, just click and hold on one and drag it around.
Procreate Layers Menu
 2")
When you tap on any of your layers a new menu appears (1b).
And it has some insanely awesome options you will find yourself using a lot!
- Rename. Change the name of your existing layer to keep yourself organized (unlike me).
- Select. Select everything inside the layer (for example, the drawing you did on it)
- Copy. Copies the items on the layer entirely that you can then paste inside this canvas or a different one. (for example, when creating thumbnail sketches and then want to finalize it into a painting on a different canvas size).
- Fill Layer. Fills the entire layer with the color you currently have selected in your color wheel.
- Clear. Erases all of the content on the selected layer.
- Alpha Lock. Locks the pixels that are present on this layer (great for locking your lineart if you want to change its color, or if you are working with a shape and want to only work within it).
- Mask (2b). Creates a new masking layer on top of your existing one. On it, you can work with black, white and grey in order to erase parts of the layer or change their opacity without damaging it. Black erases, white brings it back and different greys affect the opacity.
- Invert. Automatically inverts colors of this layer to its complementary color.
- Reference. A super handy tool for those working in line art. I created a video tutorial and an article on it that you can read/watch here: “Procreate Reference Layer Tutorial + Color Drop (Video)”.
- Combine Down. Combines the selected layer with the one below it into a group.
- Merge Down combines the content of 2 layers into 1 layer.
Also, if you ever want to hide the layer you can tap on the visibility icon (3b) to turn it ON and OFF.
Procreate Layers Swipe Menu
 3")
When you swipe any of the Procreate layers, 3 new options will appear.
- Lock (1c).
- Locks the layer. You won’t be able to draw or edit it anymore (until you unlock it by swiping also). Great option if you know you won’t need to work on this layer anymore, and you don’t want to accidentally ruin it (talking from experience).
- Duplicate(2c).
- Duplicates the layer and all of its contents above your current layer. Great if you want to make a change but not sure about it yet. This way you can do what you wish on a new layer without being scared to make irreversible changes to it.
- Delete(3c).
- Deletes the entire layer.
Quick Tip:
The first time I opened Procreate and painted something I kept looking for the “Save” button as I’m so used to having it in Photoshop. However, in Procreate, the changes you make are saved automatically as soon as you exit the canvas!
It’s great because you will never lose your progress by forgetting to save!
But you also should be careful with it, and don’t exit your canvas if you made some change you don’t want to keep!
Procreate Layers Video Tutorial
In this video I go over all of the content mentioned above as well as some additional things:
- Layer modes and which ones are my favorite
- How to select multiple layers and group them together without having to do it one by one
- and other useful tips.
In it you will hear me refer to other things “we have covered previously”. That’s just me referring to the other video lessons and modules inside the Mastering Procreate App Course.
- I also know that many people struggle with painting hair, so I’ve combined a list of 18 Procreate Hair Brushes for Believable Hair Painting if you want to check that out.
- As well as an article of 10 Procreate Tips and Tricks – Things Every Procreate Artist Needs to Know and Do.
Enjoy!
Don’t forget to subscribe to Procreate Freebies!
2 Free hair Brushes and 20 Tips for Procreate PDF:


2 Responses
Hey Anna, I like to know something about Procreate app. When your artwork is saved automatically after leaving the canvas, does this app saves your creations to your storage drive?
The artwork is saved on the inside of your Procreate App. So if delete the app, the artwork will be gone too. I suggest manually saving your work to your drive or sending it to your computer. I usually use AirDrop for this. Hope that helps! 🙂