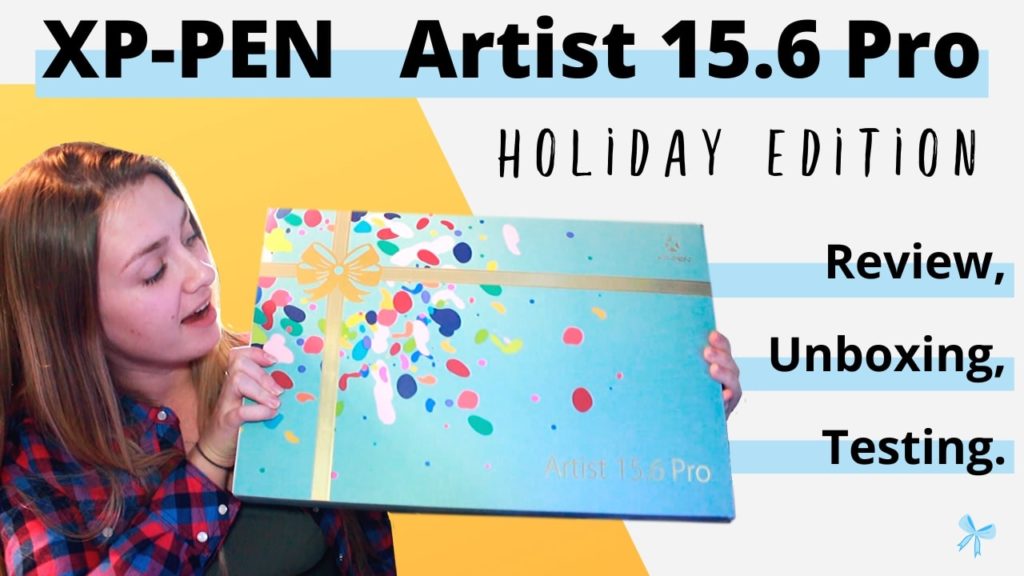
In this article + video I’ll be looking at XP-Pen Artist 15.6 Pro by sharing my unboxing and review.
It’s a Holiday Edition – so how good of a gift is it for your beloved artist or yourself?

XP-Pen Artist 15.6 Pro (Holiday Edition)
The Holiday Edition includes a bunch of cute gifts 🙂 You can check it out for yourself here:
XP-Pen Artist 15.6 Pro Video Review & Unboxing
Artist 15.6 Pro Tablet Review Transcription
This thing is heavy. Hi guys, Anna here from yourartpath.com and today I have a special treat for myself and for you guys: I’m going to be reviewing the Artist 15.6 Pro Holiday Edition by XP-Pen. So it is a pro version, it is a holiday edition, so it includes a few gifts, which I’m really excited to see! And, um, yeah, it’s a graphic tablet, so let’s dive right in, see the quality, see what’s inside and if it’s a good gift or not. Let’s get started!
So what do you guys think about the packaging? When I saw it, I thought, “Oh my God, when you open a present, and you see this kind of box inside… That’s pretty cool!”. I love how it plays around with the light. I love how colorful it is and that it looks like a little ribbon on top of the packaging. I think it’s a beautiful, beautiful touch. They did to the packaging design, especially because it is a holiday edition, so you do want to show that celebration and happiness and joy, and I think they’d done a lovely job creating this within their overall outside packaging design. But enough of talk of the outside stuff. Let’s open it up and see what’s inside, shall we? Okay.
So I’m going to begin by opening up the box. Okay. Here’s what the tablet looks like. It’s huge. I think it’s a pretty big size. It feels very durable. It definitely has a little bit of weight to it, but otherwise, it’s pretty light. It feels like you could drop it, but not break it. Yeah, I’m not going to be trying that. Nope. But yeah, it’s a pretty big size. I’m actually impressed by how large of a space it is, and I’m very excited to try working on it. And just so you know, for the reference, I used to use Wacom Pro tablet that you look on the screen and then you paint, and then I upgraded to iPad pro, uh, 13 inches, so I could look at what I’m painting, which is my preference. And there’s nothing wrong with the other options. But just so you have something to compare it to. If you have a 13-inch laptop or a 13-inch iPad or just a ruler, if I put ’em together, um, there you go. It’s a big difference. I understand that not all of it is the surface for painting, but it’s a big difference and I’m excited to try working on it. We have some information on how to contact them in case something is wrong. Um, and then pretty much here, they’re just talking to us about the protection film that we should take out. But before I get into working with this awesomeness, I want to see what else is in the box because I’m spoiled like that.
So I just took my phone video camera, so the quality might be way worse, but this is what it looks like when you open it up and see what’s inside. Just for your reference guys. So this is what it looks like. It’s a pretty neat little thing because I do like working when the screen is not positioned right on the table, rather, it has been tilted up. So this is a very nice addition if I can figure out how to use it. Oh, there you go. So I guess you can just place it and then you can put the tablet on top, which we’re going to be doing very soon. I figured out that this looks better than just a white. So anyway, if we look at what else we have inside. So I guess we have the manual. Okay. So, yeah, so we have this little manual. And if I open it up, we have more gifts! Okay.
So we have the cloth to wipe the screen. Very neat. We have information about where to download drivers and some more information. “Thank you for supporting” note. Very nice. Ah, we have a greeting card. I don’t know if you can see it, but it says drawing different. Very cute. Then we also have a drawing glove. Very cool. Let’s put it on. So this drawing glove is pretty cool. It helps your hand not slide while you’re working. Aw, we have a cute little 2020 calendar. I think it’s pretty adorable. It also says that in the back “drawing different” 2020 XP-Pen. And I guess we will have little beautiful drawings for each month. I think that’s really adorable. I love it. I am definitely going to be using it and it’s a standup calendar. So cool. I love it. Let’s see what else. Um, and then we just have the quick guide. Okay. So that was inside there. We also have some cables. They are a bunch of cables, which I’m going to have to figure out how to plug in and into what, um, I’ll get back to you on that.
Okay. Next, we have the pen holder. Finally, it looks big. It looks pretty cool. Definitely sturdy. It says we have eight XP pen nibs. Okay, so just unscrew that. There’s the pen. Okay… Oh! You can pull it out. Cool. So we have this battery-free stylus pen which means there’s no charging, like 4ever, which is pretty amazing. With my iPad Pro, I love it to death, but I do have to charge my pen quite frequently, and sometimes it’s annoying because I just want to get to drawing, but I can’t. So with this guy, no problem. It does feel very comfortable. And I like the little red indentation here, which you will also notice on the tablet later on. So they just kind of follow that example. And let’s see… So I guess I’m going to have to unscrew this part, and there we have the nib. Okay, let’s see what else we have because I pulled out all of these and I had no idea what to do with them, but now I know it was on the first page of the guide. Super easy. And there are different AC adapters, I guess, depending on which country you are and which wall outlets you have, so they think through it. Okay.
And since we picked up all the most important things, you might be like, okay, that’s it, right? Well, no, because it’s a holiday edition you’ll be getting two additional gifts from the XP-Pen team. We get this cool phone stand. It’s really cute. This phone stand has the XP Pen’s mascot. His name is Fenix, and he’s absolutely adorable and you might even see him on other things that are connected to XP pen, for example. We also get this incredible enamel pin with a Fenix as well. And it’s a really, really cute, enamel pin, so if you like enamel pins, you’re going to love this one. I know, I do. I have a bunch of them. Okay, guys. So we just opened everything and my desk is a mess, let me tell you. But there are a lot of things inside this box. So if by the end of the video you decide like maybe it’s the right time for you to get it, or if you’re interested in getting this tablet, I will leave a link down below in the description and for you to check out this specific holiday edition because the price is cheaper. They do have a discount and they give you extra things. So I think it’s a really cool thing that you’re watching this video during the holiday season, and if you are not, wait for the next year, maybe, they’ll have another one. Okie Dokie. So I’m going to clean up very quickly and then I’m going to try to install the tablet and set everything up. Then I’ll get back to you, see ya soon.
Okay, so let’s get straight into it. I spent quite a lot of time setting up the hotkeys that you can see right on the side, and there are eight of them. They’re completely customizable, so you get to choose whatever you want them to do. Uh, but I will not get too much into the details of the hotkeys. As they are pretty self-explanatory and very much so, a personal preference. Instead, what I would like to really focus on is the pen itself. It supports 60 degrees of tilt and 8,192 levels of pressure sensitivity, which pretty much gives you more accuracy, control, and fluidity of lines going from thin to thick lines. It’s in your control now, so let’s see how true it is and how well it performs. I’m going to grab the hard round pressure size brush that’s in the general brushes. Everybody should have it. I’m going to make sure to click this button right here, which allows the stylus to control the brush, and I picked a pretty fat size. Now I’m going to select the black color and let’s see, so I’m going to start with fresh, like light pressure into hard pressure and see if it changes anything. Let’s go. Okay. That’s really cool. So it’s completely controlled by how light and how dark I press it. That’s really, really awesome. Cool. Um, what I’d also like to see is the opacity and if it changes, so I’m going to click on this button right here, and that will allow my stylist to control opacity. Let’s see it again. There you go. Now we have this lovely ingredient that is completely in my control, which is kind of scary, but it’s also really, really awesome and beautiful. Let’s see how it performs with some texture brushes. Let’s make sure the size is bigger. Okay. The texture brushes are awesome as well. Awesome. So as you can see, whenever I make a brushstroke, it follows a right away. There’s no delay. So that’s pretty awesome. And then we have the tilt. Yep. And the tilt is working just fine. As you can see, I’m tilting my stylists at the moment and it still works, which would be great for shading. So that is fabulous and I can choose the eraser and start erasing the parts I don’t like. I also set it up so I can undo and redo and that I can have the eyedropper tool, but again, that’s all in the hotkey section, which you can set up for yourself. But generally, I can see that it works beautifully. So that’s a really cool thing. Let’s create a new layer. Maybe let’s draw a little bit. So, I completely forgot about my awesome new glove… Going to put it on.
I love how it responds to texture and how easy it is to work through it. As you can see, I’m building my capacity one by one, so it definitely is a very responsive stylus and a tablet, which is a nice thing for sure. As you can see my way of drawing is very intuitive. I sketch a lot. Lines are not perfect, and I think it’s more fun to do it that way for sure. When one gets into the refinement stages, that’s when you want that perfectionism, those great lines, and strokes that show that you were sure about what you were doing. When you’re just in the sketching phase and you’re trying to figure out proportions, you’re trying to understand what this image is telling you. That’s when you can get loose a little, you know. I think sketching is my most favorite part of the work. That’s because this is the time when you get to create the final image.
All right guys, so it’s about 01:14 in the morning and yes, that’s Norman Rockwell’s painting. I love him. Um, and honestly, I couldn’t stop playing with the tablet. It was such a nice gift. I really enjoyed the unwrapping it, holding it in my hands, putting it together. It did take me about 20 minutes to set everything up the way I like it. First of all, the tablet connecting it, um, reading the guide was really helpful. It’s only like three pages, but it just explains it step by step, which is really cool. And then I spent quite a lot of time setting up the Hot Keys, not because it was complicated, it was really like straight forward. Click here, click there. So it was totally cool. But I was just trying to make it perfect for me for the next time when I start painting on this “bad boy” and actually using it to its full ability, creating digital paintings and I want it to make sure that my setup is just the way I like it. If you would like to see what my setup looks like, I am going to write down all of them step by step. What’s the key number one, two, three, and why I decided to do so. I’ll leave a link down below in the article where I’m going to transcribe this video, add some additional images and the hotkeys. So if you want to check that out, you can do so in the link down below. All that being said, I’ve really enjoyed this tablet. I loved unwrapping. I loved setting it up. I love the little other tiny gifts they included in this holiday special. Um, and, I loved working with it and I hope to keep working with it in the future and create digital paintings. That’s why I spend so much time setting everything up. I hope you enjoyed this review and honestly, I think it would be a wonderful gift for an artist. And if you are an artist and you think it would be a wonderful gift for Christmas, do leave a comment down below. I would love to see how many of us are out there. If you have any other ideas for upcoming content that I should be creating and that you would be interested in, do leave a comment below. I’d love to read it and get back to you. And if you guys liked this video, do leave a like, subscribe if you’re interested in more artsy content and I’ll see you next time. Bye.
Holiday Edition – What’s in The Box?
So, as I mentioned previously since it’s a holiday edition it has a bunch of cute little gifts!
So here is everything you’ll receive when you buy this display tablet:
1. Tablet
- 15.6 inch full-laminated IPS Display Tablet
- Higher color coverage, up to 88% NTSC (a.k.a. different from other tablets and has better colors!)
- 8 customizable hotkeys + 1 red dial

2. Display Stand
- Has only one position (no adjustments)
- Really useful if you like your working surface to be slightly tilted up. (see the video above for more details)

3. Stylus + Pen Holder
- It’s a battery-free stylus! No more dead batteries, folks 😉
- The stylus has 60 degrees of tilt function and 8,192 levels of pressure sensitivity.
- The 2 buttons on it are customizable as well.
- The holder also includes 8 XP-Pen nibs.

4. 2020 Calendar, Cleaning Cloth & a Greeting Card
- The cleaning cloth works wonders, I’ve used it a few times already.
- The greeting card is especially cool if you are getting this tablet as a gift!
- The 2020 calendar has a cute drawing for each month.

5. Phone Stand and Enamel Pin
- Both the phone stand and the enamel pin feature XP Pen’s Mascot – Fenix. Isn’t he just adorable?
- These 2 are simply a great addition to a cool gift.

6. Packaging, Drawing Glove + Others…
- Special Gift Packaging is one of my favorite features of this Holiday Edition. It just looks so much more joyful and celebratory!
- The drawing glove will help your hand not slide while using the display screen. Also, it helps with staining it less.
- And finally, the box also includes instructions manual, cables and AC adapters.
Artist 15.6 Pro Features & Specs
| Item Size (in.): | 17.52 X 11.22 X 0.43 |
| Weight (lb.): | 8.20 |
| Working Area (in.) | 15.6 |
| Pen Pressure: | 8192 |
| Express Keys: | 8+Red Dial |
| Display Resolution: | 1920 x 1080 |
| Color Gamut: | 88% NTSC (120% sRGB) |
| Tilt Support: | ✓ ( 60 degrees ) |
| Includes Stand: | ✓ |
| Compatibility: | Windows 10/8/7 (32/64bit) and MAC OS 10.10 and above |
Where To Find This Deal?
Here are all of the places you should check out to find this Holiday Edition:
Artist 15.6 Pro Driver
To start using the display tablet, you will have to download and install a specific driver.
To find the right driver for you, go to this page by XP-Pen, and choose the right option for you based on which computer software you have.
On the left, you’ll also be able to download PDF guides and manuals for this tablet.
XP-PEN: 8 Hotkeys Set Up
Setting up the 8 Hotkeys is super simple!
They are very much so a personal preference, so depending on your way of working, your hotkeys will probably be different from mine. That’s OK.
You will figure out which ones work best for you after painting for a bit. I’ve had to change mine 3 times already! Now I’ happy with this setup 🙂
Step 1. Open the “Pen Tablet Settings” Application.
Step 2. Choose one of 8 hotkeys and set up your preference.
Told ya, it’s so easy!
And you don’t even need to use one of the pre-created options. You can create your own!
To do so, just click on “Reset Customer Defined” and type in your shortcut. Then name it and you are good to go!
Here is what my setup looks like at the moment:

- K1 – Rotate Canvas (r)
- K2 – Redo
- K3 – Undo (mine is custom, Ctrl+Shift+z)
- K4 – Changes built-in Functions for the Red Dial.
- K5 – Eyedropper tool (i)
- K6 – Brush Tool (b)
- K7 – Right Click
- K8 – Save
The Built-In Function Key affects how your Red Dial performs. It has a lot of pre-defined options, but you can select which ones you would like to keep!
I only left the “PS Zoom In/Out” and “Brush Size +/-“, but you should play around and see if you like the other options as well 🙂

My First Art Using It
All of those features are great, but…
A tablet is only as good as the results it can provide!
So I took it for a run 😉
During my video review, I used it to create a simple sketch using a textured brush. I wanted to see if the tilt for shading works, and if there is any lagging or inconsistencies.
The result was this sketch below. It was a very intuitive tool to work with! If you had any tablets previously, you will find it easy to get used to this one.

Then, I also had to create an illustration on “FOMO” (fear of missing out) topic. So I figured, why not use this Artist 15.6 Pro tablet again and see how it feels to work on it for 20+ hours.
The final Illustration is below, and it felt great! (even for such an extended period of time).

The pen feels comfortable in my hand, and the hotkeys are super useful! I’ll definitely be using it for most of my future work!
Final Verdict – Is It Worth The Cost?
Here is the honest truth you guys…
If you compare the XP PEN Artist 15.6 Pro to some of the best graphics tablets, or some of the cheapest tablets…
This thing is a beast!
Sure, nothing in this world is perfect, and there is always room for improvement. But as a display tablet AND at this price – it’s reaaaaaalllyyy good!
So if you are wondering if it’s worth the cost for yourself, or as a gift for someone else…
I think that it definitely is!
And all of the friends who come over to my house are incredibly impressed as well and want one for themselves.
Now the mic is on you – are you getting this tablet?
And if you own it, what’s your experience using it?
Leave a comment down below!
Save This Article To Your “Art” Pinterest Board!

XP-Pen Artist 15.6 Pro (Holiday Edition)
The Holiday Edition includes a bunch of cute gifts 🙂 You can check it out for yourself here:


4 Responses
Just order one for my 6 year old daughter is that good christmas gift ?
It’s an amazing Christmas gift!! She is going to LOVE it! <3
Best gift for upcoming Christmas-2019 I am planning to gift my daughter.
I’m sure she will love it, Andrew! 🙂